
Search results for "Stress level" in Home Design Ideas


 Heartwood Kitchens
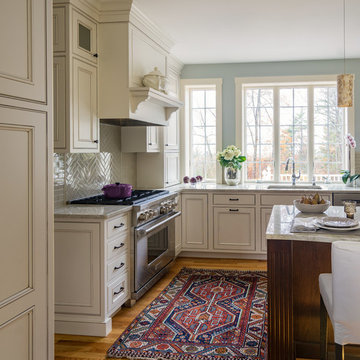
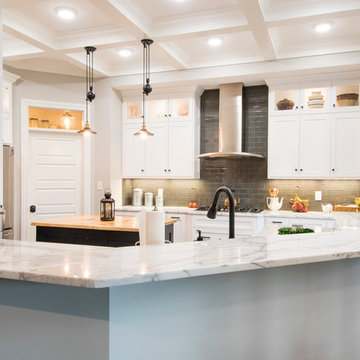
Boxford, MA kitchen renovation designed by north of Boston kitchen design showroom Heartwood Kitchens.
This kitchen includes white painted cabinetry with a glaze and dark wood island. Heartwood included a large, deep boxed out window on the window wall to brighten up the kitchen. This kitchen includes a large island with seating for 4, Wolf range, Sub-Zero refrigerator/freezer, large pantry cabinets and glass front china cabinet. Island/Tabletop items provided by Savoir Faire Home Andover, MA Oriental rugs from First Rugs in Acton, MA Photo credit: Eric Roth Photography.
Find the right local pro for your project
 Canyon Design Build
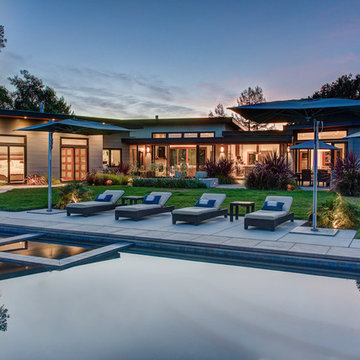
Orinda, CA full property design and remodel by Canyon Design Build. Canyon completed every aspect of this design from the outdoor entertaining space, to the kitchen, living, dining, bedrooms, and bathrooms.


 SoBo Homes, Inc.
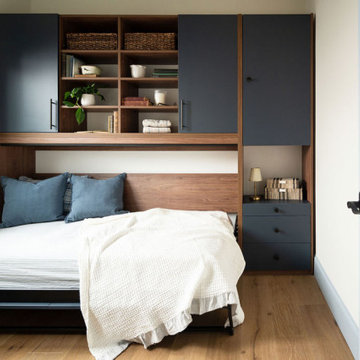
A Murphy bed lends a comfortable guest space in an office.
Example of a small french country guest bedroom design in Denver
Example of a small french country guest bedroom design in Denver

 Loving Design Interiors, LLC
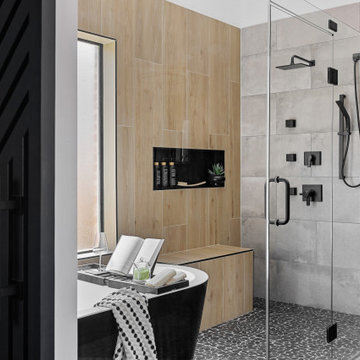
Example of a trendy beige tile and gray tile pebble tile floor and gray floor bathroom design in Dallas with white walls, a hinged shower door and a niche
 Ecraft LLC.
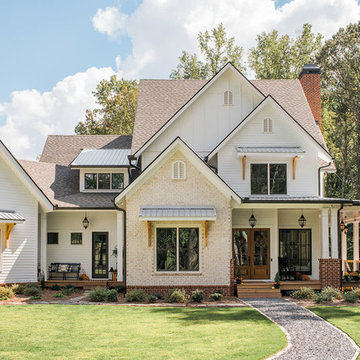
This custom home was built for empty nesting in mind. The first floor is all you need with wide open dining, kitchen and entertaining along with master suite just off the mudroom and laundry. Upstairs has plenty of room for guests and return home college students.
Photos- Rustic White Photography
 Studio Dearborn
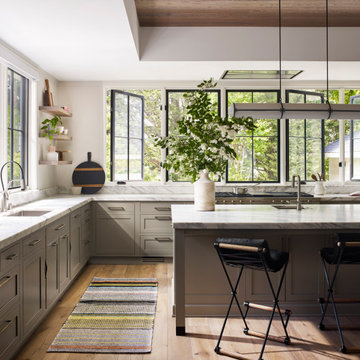
This expansive Victorian had tremendous historic charm but hadn’t seen a kitchen renovation since the 1950s. The homeowners wanted to take advantage of their views of the backyard and raised the roof and pushed the kitchen into the back of the house, where expansive windows could allow southern light into the kitchen all day. A warm historic gray/beige was chosen for the cabinetry, which was contrasted with character oak cabinetry on the appliance wall and bar in a modern chevron detail. Kitchen Design: Sarah Robertson, Studio Dearborn Architect: Ned Stoll, Interior finishes Tami Wassong Interiors

 GALAXY OUTDOOR LLC
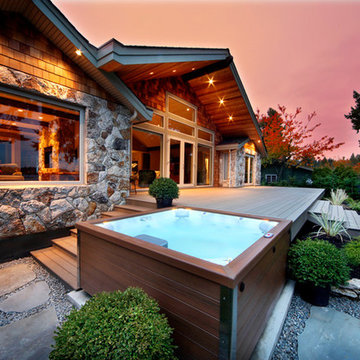
Whether it’s arthritis, joint or back pain, restless leg syndrome, muscle injuries or fibromyalgia, hot tubs are a proven form of chronic pain relief. The heat of the water increases blood flow and relaxes the body, while the massaging action of the jets and the water’s buoyancy loosen muscle tension and soothe sore joints.
The New England Journal of Medicine (08-16-1999) found that, after just 10 days, patients with Type 2 Diabetes who used hot tubs 30 minutes a day/6 days per week required reduced doses of insulin, lost weight, slept better and showed distinct decreases in plasma glucose and glycosylated hemoglobin.
Hot tubs can be a great fix for those suffering from insomnia, helping your body to wind down before bed and get the natural sleep you need. Even if you don’t suffer from chronic sleep problems, the Better Sleep Council recommends establishing a relaxing bedtime routine, such as soaking in hot water to help maintain a healthy sleep cycle. According to the Council’s findings, warm water releases muscle tension and increases blood flow, both of which contribute to a relaxed and deeper, more comfortable sleep.
Whether it’s a new exercise routine or an unusually active day on your feet, most of us know the “day after” feeling of sore, overworked muscles that make it hurt to move, period. The water pressure from hot tub jets relieves muscle tightness and soreness by removing lactic acid, opening up the blood vessels and promoting the flow of endorphins. LPGA Sports Medicine Director Caroline Nichols and former President of the American Orthopedic Society of Sports Medicine Dr. James Andrews recommend hydrotherapeutic activity for athletes at every level. Nichols says that hot tubs especially help with recovery since jets focus on overused muscle and joint regions, while Andrews supports hydrotherapy as a good tool for improved circulation, sensory impulses and stiff joints.
Whether you’re looking to alleviate stress, feel healthier or simply spend more time with your loved ones, you’d be amazed at how as little as 10 minutes in a hot tub can help you relax and put everything in perspective. There are hot tubs for every type of user, regardless of whether it’s just you or it’s the entire gang piling in, looking for some much-needed relief after a long day.
 Progressive Design Build
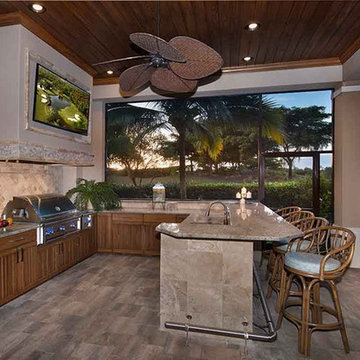
Here in Florida, we’re blessed with great weather year-round. So it’s no surprise that outdoor entertaining areas are an extremely popular way to enhance outdoor living. When our clients requested an update to their existing outdoor kitchen while they were away on vacation, we were ready to hit the ground running. While their beautiful 2-story home on a golf course had a pool and covered lanai area, the existing outdoor kitchen just didn’t function well for their needs. Mainly, they craved additional counter space and more seating. And, as avid football fans, with a son playing on a renown Division 1 college team, they also wanted a large screen TV to watch games. After all, what better way to share game day excitement than at a barbecue with family and friends?
A Bigger, Better Kitchen Layout
Our brilliant design team came up with a much larger, u-shaped outdoor kitchen layout for increased functionality. The extra base cabinets provided plenty of storage as well as a foundation for additional countertop space. Adjacent to the sink, we added a 24” outdoor refrigerator to keep food and beverages chilled, and the high top bar allowed for more seating around the perimeter.
For cooking, our clients selected a much larger Lynx grill and side burner to replace the original grill. While the kitchen was already set up for a grilling area, it required a hood, so we built and installed a custom hood for proper ventilation. Then, we added a large screen TV above the hood for easy viewing.
Finishing Touches
To softly illuminate the entire space at night, we installed additional recessed light fixtures into the ceiling and under the grill hood. We also tied the Cypress wood ceiling and the crown molding together into the design with a luxurious cabinet stain. Along with these finishing touches, we added a decorative travertine stone backsplash behind the grill and homogenized the front face of the bar for a polished, matching look.
Ventilation Challenges
With the outdoor kitchen lanai located directly under a second-floor living area, we had expected to tuck away ventilation ductwork between the second-level floor joists and the exterior wall running parallel to the grill hood. However, upon further investigation, we discovered the second floor joist system, in fact, ran perpendicular to the grill hood. In short, we needed a new way to hide the venting without compromising the original design.
Our team came up with an inspired solution: Construction of a false wall behind the outdoor kitchen allowed us to run ductwork without creating a visible chase for the vent, thus maintaining a symmetrical look on both sides of the grill and decorative hood.
Exceeding Expectations
In the end, we didn’t just meet our clients’ needs for a beautiful outdoor kitchen update – we exceeded them. As planned, we completed the new outdoor kitchen while they were out of town. But when our clients returned from vacation, they were so impressed with the results (and the stress-free design/build experience) that they promptly hired us for another extensive remodel – a stunning home addition!

Sponsored
Delaware, OH

Buckeye Basements, Inc.
Central Ohio's Basement Finishing ExpertsBest Of Houzz '13-'21
 Elite One, Inc.
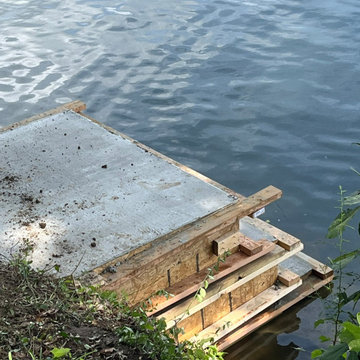
This custom adjustable concrete dock landing was engineered to provide safe, dependable access between the shoreline and dock while accommodating changing lake water levels. The adjustable platform allows the homeowner to lengthen or shorten dock lines as water levels rise and fall, reducing stress on the dock system while maintaining stable, reliable waterfront access. Built with reinforced concrete, this durable solution is designed for long-term performance in a demanding lakeside environment.
 Windy City Painters
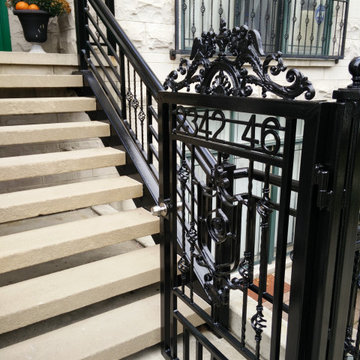
Ever notice how your iron fence looks more rust than paint after another brutal Chicago winter? That is usually the moment homeowners start searching for a painting contractor who actually understands metal - not just someone who will brush a coat of black paint over active corrosion and call it done. At Windy City Painters, iron fence restoration is one of our most requested services on the North Side and Near West Side, and for good reason. These fences are old, they are beautiful, and they deserve a proper finish system.
PROJECT OVERVIEW
This project involved a full ornamental iron fence on a North Side greystone property. The fence was original to the building - likely installed in the 1910s or 1920s - and had gone through multiple paint cycles without any rust conversion work. By the time Windy City Painters arrived, the horizontal rails showed active pitting, the vertical spindles had surface rust under lifting paint, and two corner posts had minor joint separation. The homeowner wanted the fence restored to a sharp satin black finish that would hold through multiple Chicago winters.
MATERIALS AND PRODUCTS
Ospho Rust Converter - phosphoric acid formula that chemically neutralizes iron oxide and converts it to iron phosphate, a stable paintable surface. Used on all pitted and actively corroded areas before primer application.
Rust-Oleum DTM Rust-Inhibitive Primer - direct-to-metal primer that bonds to both converted rust zones and bare metal, blocking moisture intrusion at the substrate level.
Sherwin-Williams DTM Acrylic Topcoat - flexible, moisture-resistant finish formulated to expand and contract with metal through temperature cycling. Applied in two finish coats in satin black.
For cases with deeper rust penetration, Corroseal Water-Based Rust Converter and Metal Primer is an alternative that combines conversion and priming in a single product, useful on complex ornamental profiles where two-product systems are harder to apply.
THE PROCESS
Step 1 - Mechanical Preparation. Windy City Painters wire-wheels all loose rust, flaking paint, and scale using angle grinders fitted with wire wheel attachments. On heavily pitted sections, needle gun descaling is used to reach rust in tight ornamental grooves. This step is non-negotiable. No coating bonds reliably to iron oxide, and skipping this step is the single most common reason iron fence paint fails within a year.
Step 2 - Rust Conversion. Ospho is brushed into all pitted and bare metal areas and allowed to fully react. The surface shifts from orange to a grayish-black iron phosphate layer. This stable base accepts primer without the risk of rust migrating upward through the paint film over time.
Step 3 - Primer Coat. Rust-Oleum DTM rust-inhibitive primer is applied full coverage over the entire fence surface, including areas that appeared clean but showed minor surface oxidation. DTM primer acts as a moisture barrier and mechanical adhesion layer for the finish coats.
Step 4 - Finish Coats. Two coats of Sherwin-Williams DTM acrylic topcoat are applied in satin black, with adequate dry time between coats. The DTM formula remains flexible after cure, allowing the iron to expand and contract through Chicago temperature swings without the topcoat cracking or peeling at joints.
CHICAGO-SPECIFIC CHALLENGES
Ornamental iron on Chicago greystones, two-flats, and Victorian brownstones was almost never hot-dip galvanized. It was painted from installation and has relied on continuous paint maintenance ever since. Chicago winters add specific stress: freeze-thaw cycles force water into any paint film crack, expanding it; road salt spray elevates corrosive chloride exposure; and humidity during spring thaw keeps metal surfaces wet for extended periods. This combination accelerates rust spread beneath paint films that appear intact on the surface.
WHAT TO EXPECT LONG-TERM
A properly prepped and primed iron fence finished with a DTM topcoat system should hold 5-8 years in Chicago conditions before any touch-up is warranted. Annual inspection of joints, welds, and areas near grade level will catch early moisture entry before it becomes a larger rust issue. Windy City Painters recommends scheduling touch-up earlier rather than waiting for full paint failure to protect the prep investment.
PRO TIPS
Tip 1 - Address joint separation before painting. If fence rails have separated at welds or mechanical joints, water will enter and rust will restart from inside the connection point regardless of the exterior coating. Flag any separated joints for welding before any paint system is applied.
Tip 2 - Never use latex house paint on iron fences. Standard exterior latex lacks the adhesion and flexibility for bare metal. Always use a product labeled DTM or specify a rust-inhibitive primer underneath any finish coat applied to iron.
Tip 3 - Paint in late spring or early fall. Iron fences exposed to full sun in peak summer heat can reach surface temperatures that cause solvent-based coatings to blister during application. Ideal application conditions are 50-85 degrees Fahrenheit with low humidity and no direct intense sun on the metal surface.
Learn more about iron fence painting cost in Chicago and schedule your free estimate at windypainters.com
FAQ
Q: What does iron fence painting cost in Chicago?
A: Windy City Painters typically prices residential iron fence painting at $8-$18 per linear foot. Variables include rust severity, spindle density, ornamental profile complexity, and whether rust conversion products like Ospho or Corroseal are required before priming.
Q: Can you paint over rust without grinding it off first?
A: No. Windy City Painters always performs mechanical prep before any coating. Wire wheel grinding removes loose scale and flaking paint. Rust converters handle residual oxidation chemically. Skipping this step means the new paint film will delaminate within one season.
Q: How do I know if my iron fence needs a welder before painting?
A: Windy City Painters inspects all joints and rail connections during the estimate. Rail separation, cracked welds, or sections that flex when pressed indicate structural issues that should be welded before any paint system is applied to avoid reopening at stress points.
Q: What is the difference between Ospho and Corroseal?
A: Both are rust converters. Ospho is a phosphoric acid solution applied as a separate step before priming, giving maximum control over conversion and primer selection. Corroseal combines conversion and primer in one product, which works well on complex ornamental profiles where a two-step system is harder to apply evenly.
Q: How long does the paint last on an iron fence in Chicago?
A: With full mechanical prep, rust conversion, DTM primer, and two DTM topcoats, Windy City Painters clients typically see 5-8 years of performance before touch-up is needed, even through Chicago freeze-thaw cycling and road salt exposure.
Q: Do you paint iron fences that are still structurally sound but heavily rusted on the surface?
A: Yes. Surface rust, even heavy pitting, does not necessarily indicate structural failure. Windy City Painters evaluates each fence individually. As long as the metal is sound under the rust, proper mechanical prep and a rust converter restore the surface to a paintable condition.
 Blansfield Builders, Inc.
Jim Fuhrmann,
Beinfield Architecture PC
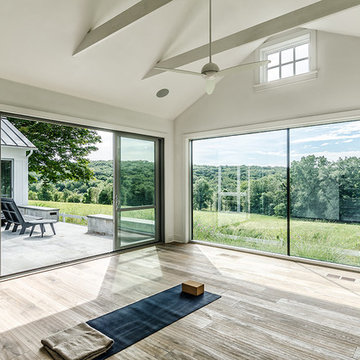
Mid-sized country light wood floor home yoga studio photo in New York with white walls
Mid-sized country light wood floor home yoga studio photo in New York with white walls
 Growsgreen Landscape Design
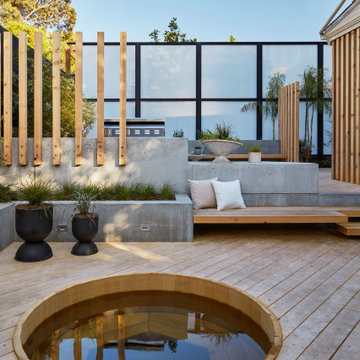
The cedar tub relates to the cedar deck, benches and beam screens. This view is from the door of the ADU looking out into the space. The greenhouse like material we used on the fence acts as a changing art piece where the shadows and lights interact with it. I designed it to be modern Shoji like screens.


 Arrow. Land + Structures
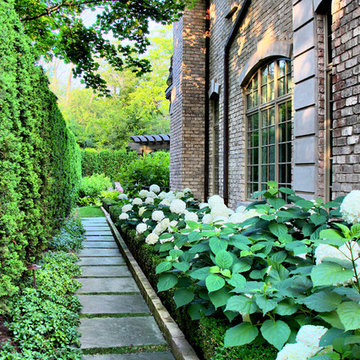
Glencoe IL Formal sideyard garden walk leading to rear yard pool oasis. French inspired theme. By: Arrow. Land + Structures. Landscape Architects and Builders----The sideyard path leads visitors towards the rear yard poolside retreat. Sideyards present an opportunity to create an an articulated approach that pulls you in towards your destination.
1